Vendors asking prepayment for their orders could be a very common scenario as part of their business policies. When this scenario arises, your business/finance team should be able to create a purchase order and create and track a prepayment against this.
In Microsoft Dynamics AX 2009, it was not possible to make a prepayment related to a purchase order and these were always two separate manual processes. There was no transaction link between the prepayment for a purchase order and the actual purchase order.
AX 2012 brings in this small yet very useful functionality. In today’s I will explain about this functionality of AX 2012 and how can be used by an organization.
We will analyze an example where an organization orders 500 items from a vendor and vendor asks for a prepayment as this is a business policy for them. The purchase order prepayment process will basically flow through the below high level steps.
- Purchasing agent creates the purchase order and submits a request to AP coordinator to process prepayment.
- AP Coordinator/Manager sets up and processes the required prepayment.
- Settle the payment against the final invoice.
Purchasing agent creates the purchase order and submits a request to AP coordinator to process prepayment:
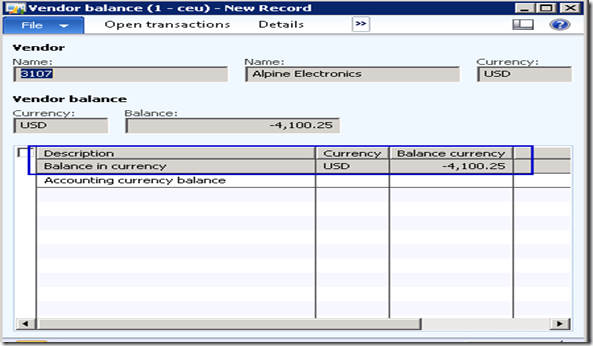
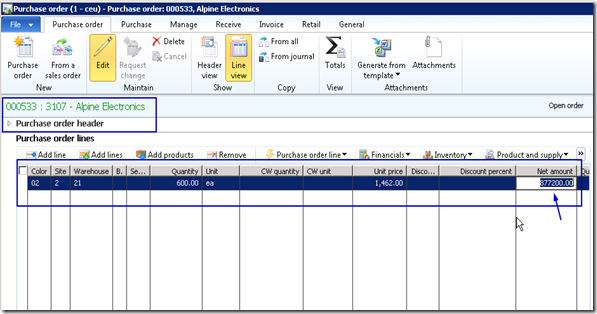
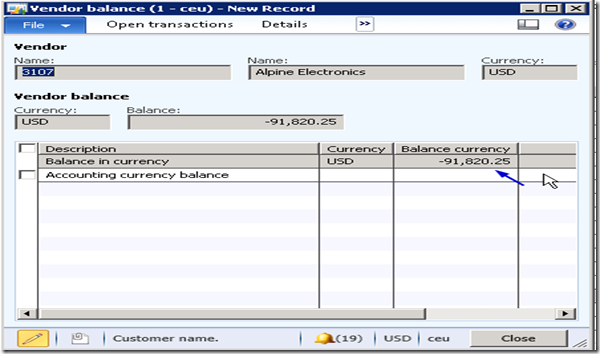
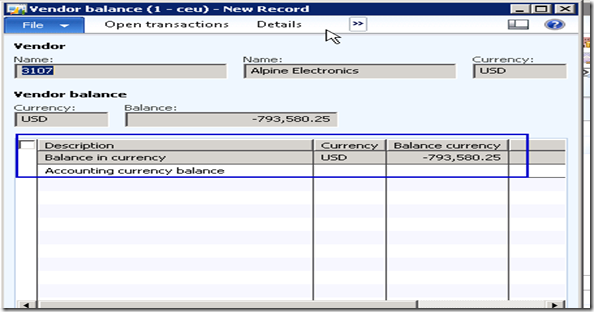
- Create a new purchase order under Accounts Payable module for vendor 3107, Alpine Electronics. Let us make a note of their balance before we proceed with a prepaid PO processing for them.
- Create purchase order header and PO line for item(1001) for 600 quantity.
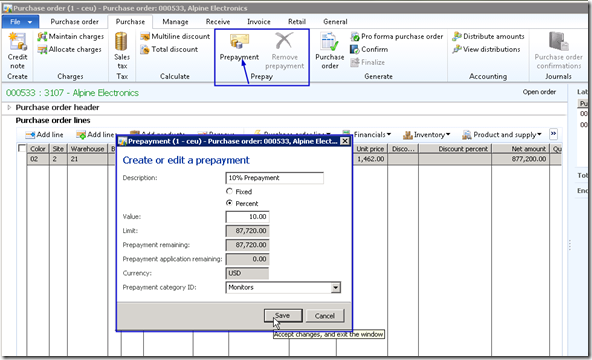
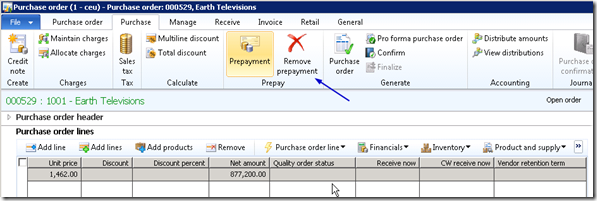
- Click the Purchase tab and click Prepay > Prepayment button.
- Enter a suitable description for the prepayment for purchase order and enter the prepayment value. In our case, let us assume that vendor has requested 10% prepayment.
- Enter 10% and verify that the prepayment remaining value which will be 10% of the total PO value. Note that you can also specify a fixed prepayment amount if vendors requests so.
Prepayments can be removed after it has been setup on a PO by clicking the Remove prepayment button. if business later cancels the prepayment.
*Note: The prepayment category ID is the procurement category against which the prepayment will be tracked
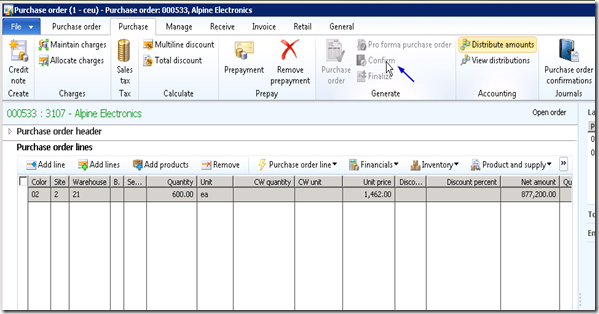
- Now, Confirm the purchase order after saving the prepayment details.
Posting the Prepayment Invoice:
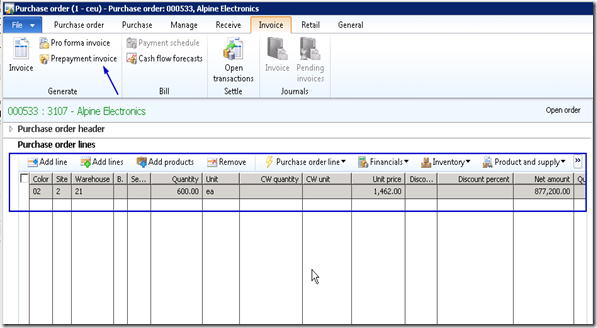
- To do this, click the Invoice tab in the purchase order form and click Prepayment invoice button.
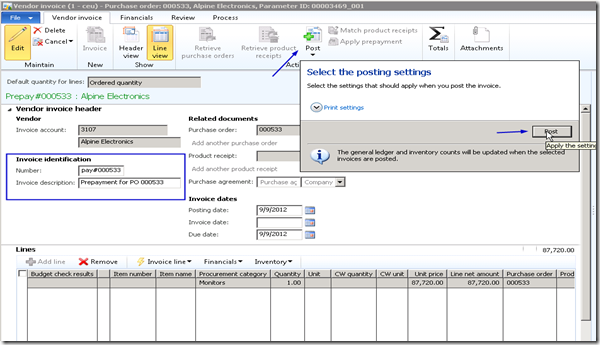
- Now enter invoice number and click Post > post button to post the prepayment invoice.
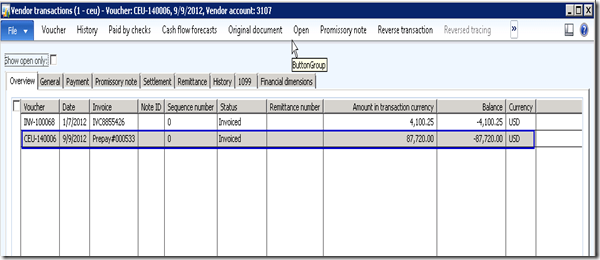
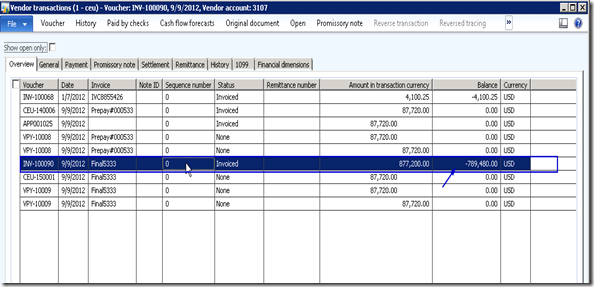
- Note the newly created vendor transaction and also take a note of the affected vendor balance. Recording of the prepayment invoice increases the vendor balance. In this scenario it is $4100.25(Vendor balance before prepayment invoice) + $87,720(Prepayment invoice amount).
AP Coordinator/Manager processes the required prepayment:
- It’s now AP Manager’s task to make the payment for the prepayment which was requested for the purchase order.
- Navigate to AP > Journals > create a new payment journal.
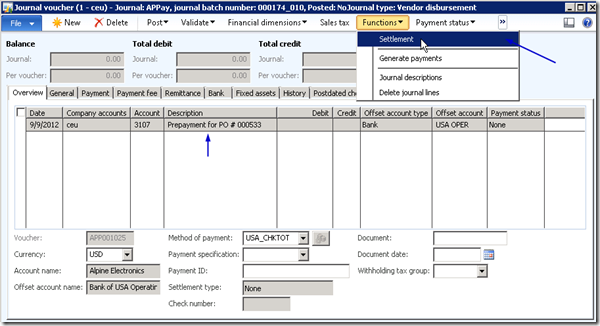
- Click payment journal line and click Functions > Settlement button and select the prepayment invoice.
- Print the check for vendor and post the payment. Make a note of the vendor transactions and the affected vendor balance also after this step. Vendor balance decreases after the payment has been made.
Settle the payment against the final invoice:
- When the goods arrive and you receive the final invoice from vendor, settle the prepayment with it.
- Navigate to Purchase order screen > Invoice tab and generate an invoice.
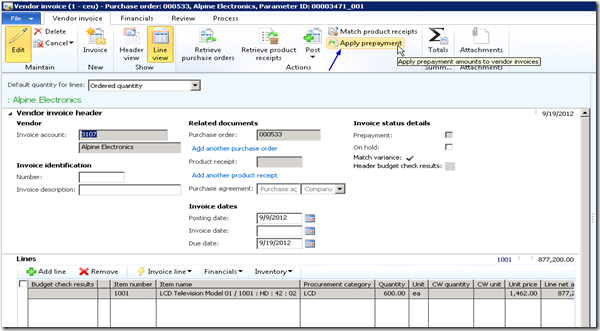
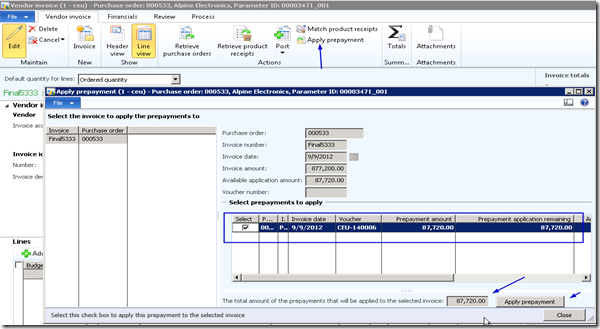
- Click Apply prepayment button.
- You will notice the prepayment record appearing here in this form. The “Select prepayments to apply” grid displays all the prepayments which could exist for the PO.
- Also notice the invoice amount is $877200 and available application amount is $87,720 which is 10% of the invoice which was paid as a prepayment to the vendor.
- Finally Select the prepayment and click Apply prepayment button. You will see that the “’Total amount of the prepayment that will be applied to the invoice will be 87720.$.
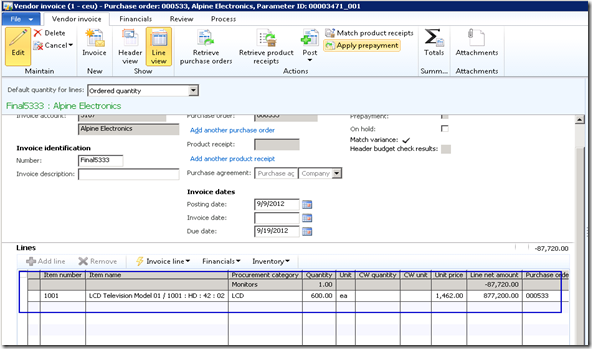
- Make a note that one line gets added in the vendor invoice line.
- Now, Post the purchase order invoice by clicking Post.
- With the PO invoice posted, let us now analyze the financial voucher and the impact on vendor balance.
End to end linking of all related transactions and their tracking in an ERP system helps finance and accounting team in a great deal during transaction reconciliations. This also ensures reduction in accounting team’s efforts and time needed to spend in the ERP system.
Microsoft Dynamics AX 2012 ensures this.
Pretty straight forward and neat. 
Do not hesitate to contact me in case you need any clarifications regarding this.
Till next time!
Thanks
Sandeep


No comments:
Post a Comment
Note: Only a member of this blog may post a comment.